
Hello Trailblazers,
In this post we're going to learn how we can create a lightning datatable in lwc. In order to create a lightning datatable we use the lightning-datatable tag where we need to specify 3 attributes:
key-field: To specify a unique identifier for each row of the table. It'll be a string specifying the key column in the data that we need to use to identify each row.
data: Information to be displayed in the datatable. The value passed to this attribute should be a javascript array.
columns: Information about columns of the datatable. This include column name and other metadata associated with it like: type, fieldName, icon details etc. The value passed to this attribute should be a javascript array as well.
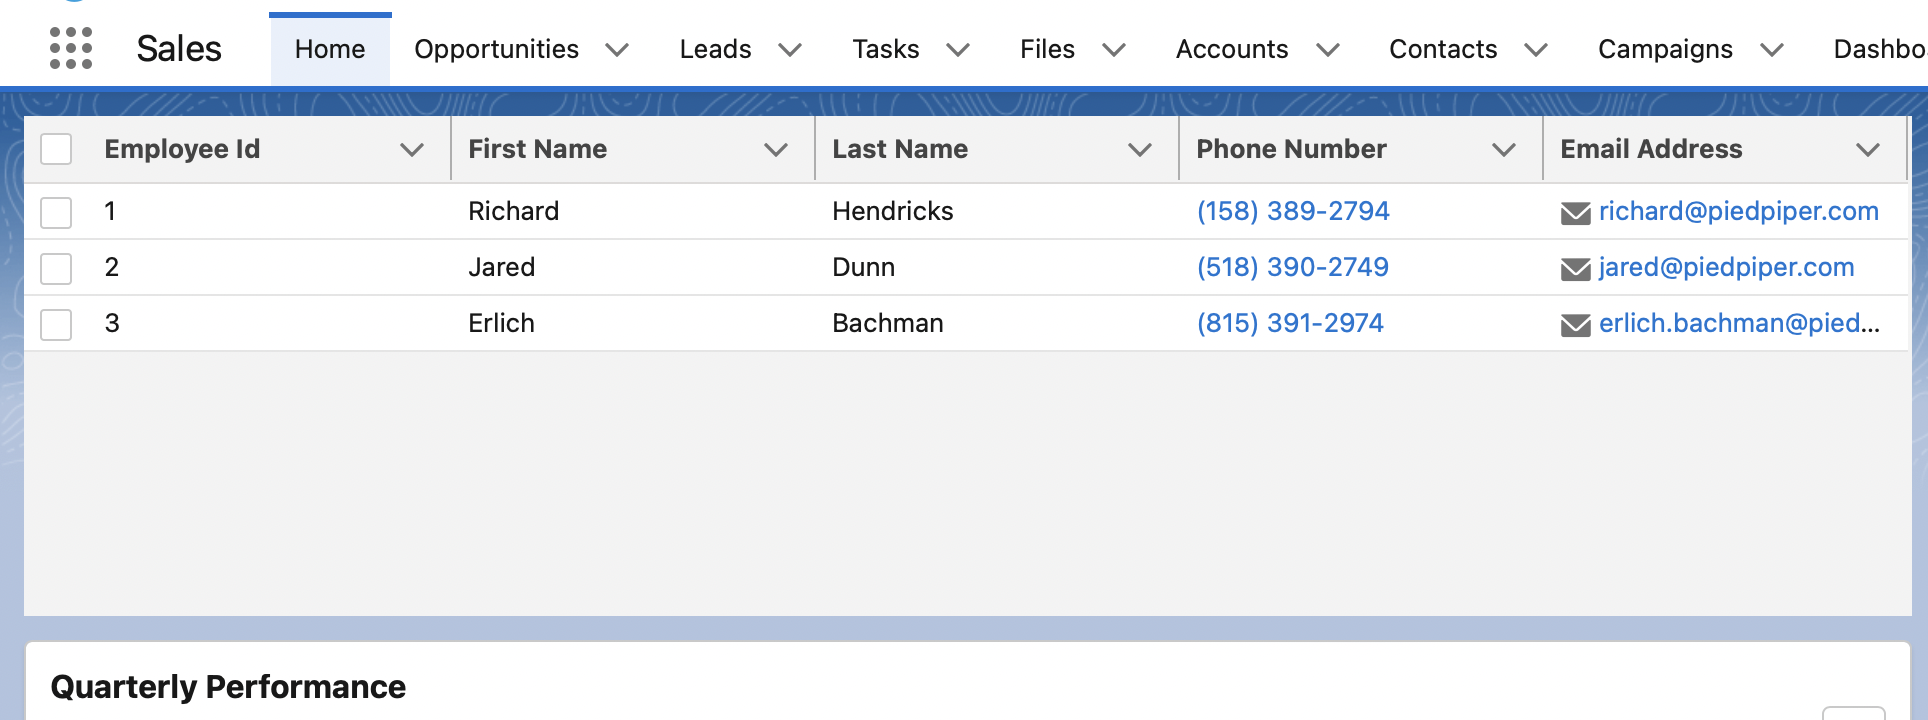
Now let's see how we can create a very simple datatable to display employees information. Each employee will have some attributes including: Employee Id, First Name, Last Name, Phone Number and Email Address. We're going to consider these 5 attributes for now and will create a datatable showcasing the data with these columns. Let's create a lightning web component now!!
We're going to name our component: employeeDatatable. First things first, we're going to display this component at the homepage, so let's setup that:
employeeDatatable.js-meta.xml
<?xml version="1.0" encoding="UTF-8"?>
<LightningComponentBundle xmlns="http://soap.sforce.com/2006/04/metadata">
    <apiVersion>54.0</apiVersion>
    <isExposed>true</isExposed>
    <masterLabel>Employee Datatable</masterLabel>
    <description>This datatable is used to display employee records.</description>
    <targets>
        <target>lightning__HomePage</target>
    </targets>
</LightningComponentBundle>
employeeDatatable.html
<template>
    <div style="height: 250px;">
        <lightning-datatable
            key-field="employeeId"
            data={employeeData}
            columns={employeeColumns}>
        </lightning-datatable>
    </div>
</template>
employeeDatatable.js
import { LightningElement } from 'lwc';

export default class EmployeeDatatable extends LightningElement {

    employeeColumns = [
        { label: 'Employee Id', fieldName: 'employeeId' },
        { label: 'First Name', fieldName: 'firstName' },
        { label: 'Last Name', fieldName: 'lastName' },
        { label: 'Phone Number', fieldName: 'employeePhone', type: 'phone' },
        { label: 'Email Address', fieldName: 'employeEemail', type: 'email' }
    ];

}


    employeeData = [
        {
            employeeId: '1',
            firstName: 'Richard',
            lastName: 'Hendricks',
            employeePhone: '(158) 389-2794',
            employeeEmail: 'richard@piedpiper.com'
        },
        {
            employeeId: '2',
            firstName: 'Jared',
            lastName: 'Dunn',
            employeePhone: '(518) 390-2749',
            employeeEmail: 'jared@piedpiper.com'
        },
        {
            employeeId: '3',
            firstName: 'Erlich',
            lastName: 'Bachman',
            employeePhone: '(815) 391-2974',
            employeeEmail: 'erlich.bachman@piedpiper.com'
        }
    ];
import { LightningElement } from 'lwc';

export default class EmployeeDatatable extends LightningElement {

    employeeColumns = [
        { label: 'Employee Id', fieldName: 'employeeId' },
        { label: 'First Name', fieldName: 'firstName' },
        { label: 'Last Name', fieldName: 'lastName' },
        { label: 'Phone Number', fieldName: 'employeePhone', type: 'phone' },
        { label: 'Email Address', fieldName: 'employeeEmail', type: 'email' }
    ];

    employeeData = [
        {
            employeeId: '1',
            firstName: 'Richard',
            lastName: 'Hendricks',
            employeePhone: '(158) 389-2794',
            employeeEmail: 'richard@piedpiper.com'
        },
        {
            employeeId: '2',
            firstName: 'Jared',
            lastName: 'Dunn',
            employeePhone: '(518) 390-2749',
            employeeEmail: 'jared@piedpiper.com'
        },
        {
            employeeId: '3',
            firstName: 'Erlich',
            lastName: 'Bachman',
            employeePhone: '(815) 391-2974',
            employeeEmail: 'erlich.bachman@piedpiper.com'
        }
    ];
}


Very clear and easy explanation!!!
ReplyDeleteGlad you liked it!
Deletesilicon valley fan <3
ReplyDeleteHaha...yes!
Delete